Wheel Pose (or Urdva Dhanurasana) is an invigorating yoga pose that takes a huge amount of stamina and determination. The pose demands maximum effort from the entire body and mind to push against gravity forming the body into an arch.
Utilizing strength from the arms, quads, glutes, and core, the intermediate pose also requires a supple back — specifically, through the thoracic region of the spine.
Backbending asanas like Wheel pose can help reverse the effects of “tech neck”— the detrimental posture developed from looking down at a cell phone or computer screen.
Opposing the inward hunching posture, Wheel Pose corrects posture by opening the shoulders and upper back, as well as strengthening and lengthening the neck.
5 Steps to Practice Before Attempting Wheel Pose
There’s no denying the intensity of Wheel Pose. And I think we can all agree that it’s one of those poses that we approach with apprehension even though we know we should do it, and afterwards we are so happy we did. If you’re quite new to yoga and haven’t attempted a wheel pose before, you might want to build up strength by taking part in the free 30 Day Yoga Challenge. It will help you get used to backbending in no time!
Before diving right into Wheel, try these steps to develop a secure and stable backbend practice.
1. Upward Dog
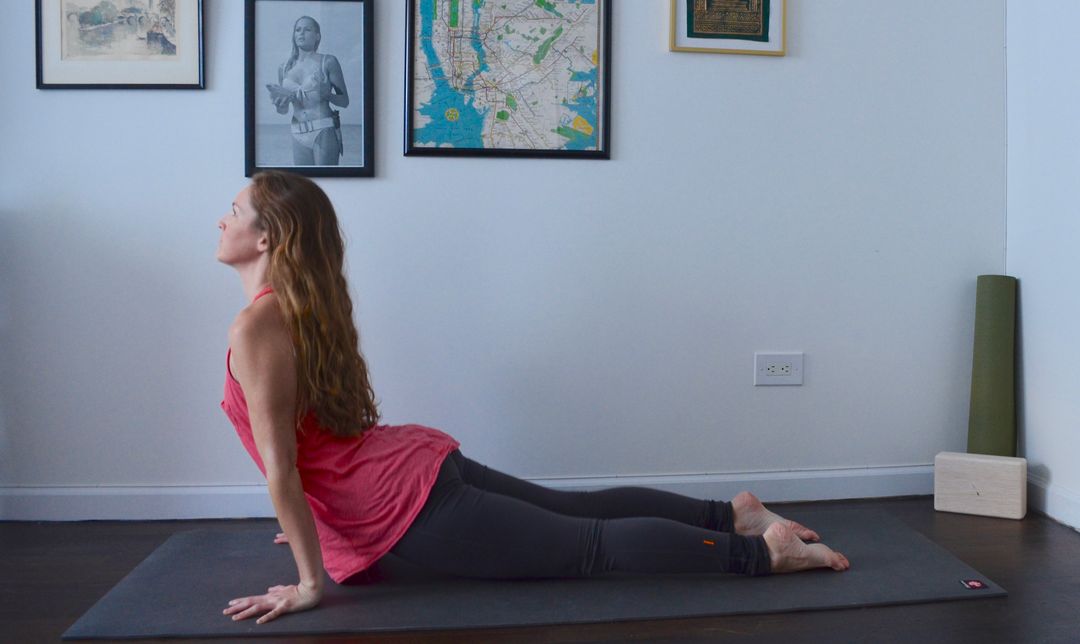
Combining several ingredients necessary for Wheel Pose, Upward Dog Pose expands the chest, tones the arm muscles, and contributes a gentle backbend.
How to: Starting on the belly with legs extended, bring the hands to the mat on either side of the chest. Bring the legs together and come onto the tops of the feet. Press the floor away with the arms as the torso rises up and forward (between the arms), while simultaneously pressing the tops of the feet into the floor.
Raise tops of the legs off of the mat. The wrists should be in line with the shoulders, and shoulder blades should draw back and down. If there is any feeling of compression in the lower back, bend the elbows to provide less bend in the back.
2. Bow
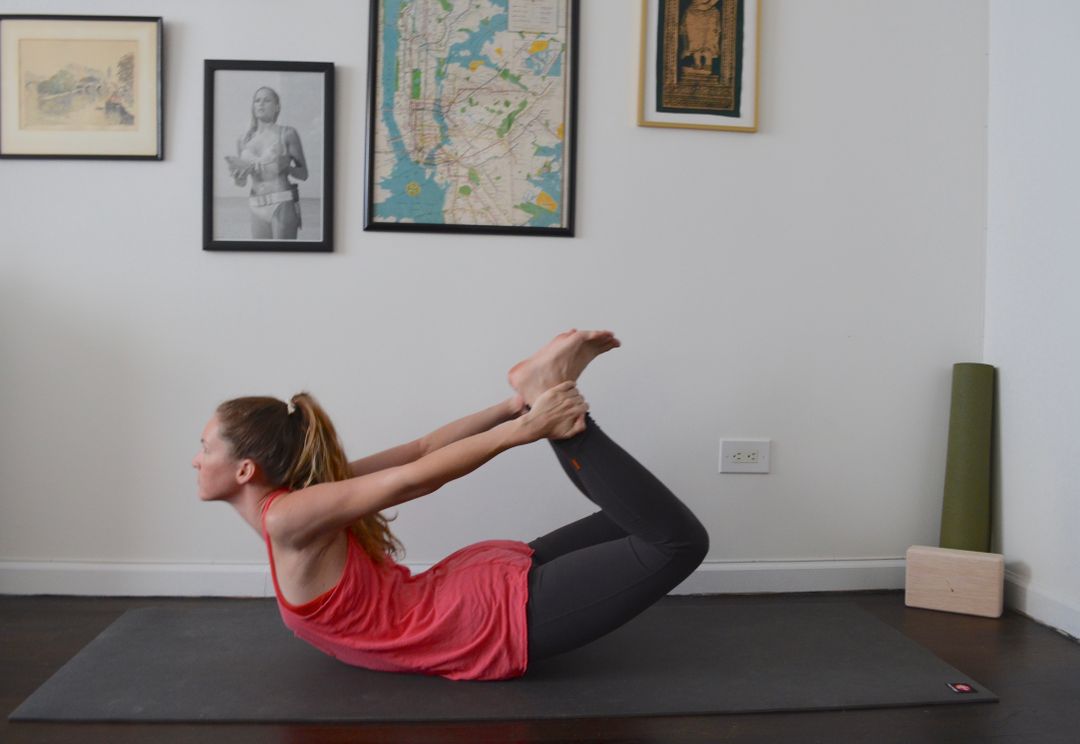
Bow Pose, Wheel’s sister pose, will tone and stretch the core while also strengthening the legs and opening the chest. Bow is one of the closest poses in comparison to Wheel (aka Upward Bow Pose) not only visually but also mechanically.
How to: Lie on your belly with your legs extended, arms at your sides with fingers pointing towards the feet. With the knees about hip distance apart, start bending through the knees and bring the heels as close to the body as possible.
Next, the reach the hands back to grab the outsides of the ankles. Once you have a firm grasp, pull the chest and thighs up off of the ground (it helps to press hands into feet and feet back into hands). Lastly, flex the feet and send the soles of the feet higher towards the ceiling.
Note: If you feel uncomfortable tension in the pose, try doing the pose on just one side at a time by pulling in one ankle and grasping with the same side hand.
3. Locust

A great preparatory pose for Wheel, Locust Pose requires and builds back, core, and glute strength. Specifically, Locust will elongate the erector spinae muscles which help stabilize the spine.
How to: From a prone position with legs extending long, rest the arms alongside the torso with the palms up. The forehead rests on the mat and the legs come to touch one another. Inhale, and upon the exhale, engage the legs and start lifting the arms, head, torso, and tops of the legs away from the ground. Keep reaching the arms back and remember the breath.
4. Camel
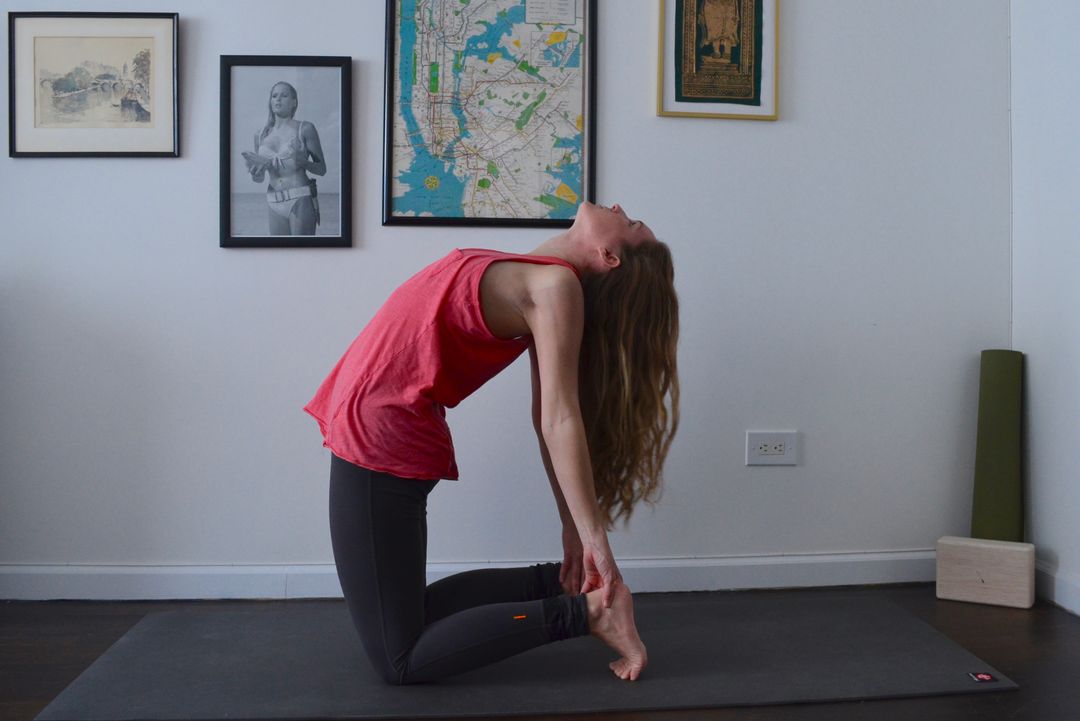
Tight hip flexors can hold back the development of full Wheel Pose. Camel Pose acts as a supportive backbending posture that will elongate the hip flexors, stretch the quadriceps, and open the shoulders.
How to: Come onto shins and knees, with the knees hip width and the torso upright. Tuck the toes and place the palms (fingers upwards) on the lower back around the sacrum. Start to draw the elbows in towards one another; this will broaden the collarbones and open the shoulders and chest.
From here, press the hands into the back, guiding the hips forward. As the hips shift forward, engage the quadriceps and send the torso back, creating an arch at the spine. When you reach a point where you feel you cannot shift forward or bend further, it’s time to release – one hand at a time – to grasp the inner ankle (thumbs are on the outside ankle).
Continue reaching the hips forward and if it’s not too much strain on the neck, feel free to tilt the chin up towards the ceiling.
5. Bridge

Perhaps one of the most approachable forms of backbend, Bridge Pose lightly stretches the back. But don’t be fooled by its mild nature; the Bridge substantially strengthens the legs for powering into and maintaining Wheel Pose.
How to: From a supine position, bend the knees, bringing the soles of the feet onto the mat. The feet should be about hip distance apart and a few inches from the glutes. Reach the arms towards the feet until the fingertip can just barely graze the heels.
Press the palms and feet firmly against the mat, engage the legs, and lift the hips towards the ceiling. The neck should be neutral with an upward gaze. Keep lifting though the hips.
When you feel confident with the above poses and open through the body, you may be ready to give Wheel a go. Remember that it’s always a good idea to flow through a few rounds of Sun Salutations to warm up the body before practicing more advanced poses.
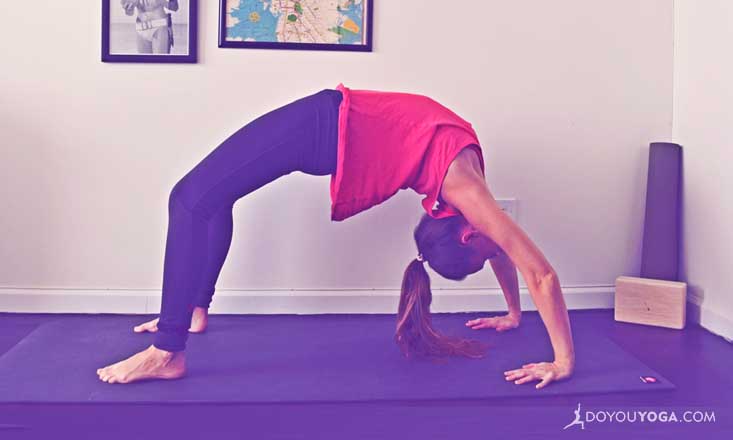
And Finally, Wheel Pose

Start lying on your back and bend the knees bringing heels in towards the hips to where the fingertips can barely graze the heels. The feet should be hip distance apart.
Ground the soles of the feet and place the palms down on either side of the head (shoulder width distance). The fingers should be pointing towards the shoulders with thumbs closest to the ears. Begin to lift the hips up by pressing firmly and evenly through arms and legs.
In the arched position, keep extending the hips, elongate the arms, and draw the ribs upwards. To keep the knees from splaying and straining the lower back, rotate the thighs inwards. Hold for as long as you can bear it, but remember to breathe! When coming out of the pose, remember to tuck the chin into the chest before bending the elbows and rolling down one vertebra at a time.
Additional Tips
Pain or discomfort from back-bending is usually experienced in the lumbar region (low back). To protect the lumbar spine, try to bend less from that region and more from the upper back. Engage the abdominals to alleviate weight from the lumbar muscles.
The pose will feel different for everybody, so safely and slowly move through different motions to see what works. For instance, if the pose still feels crunchy, try tilting the pelvis backwards then try relaxing the glutes. And as always, listen to your body and respect where you are in your practice!