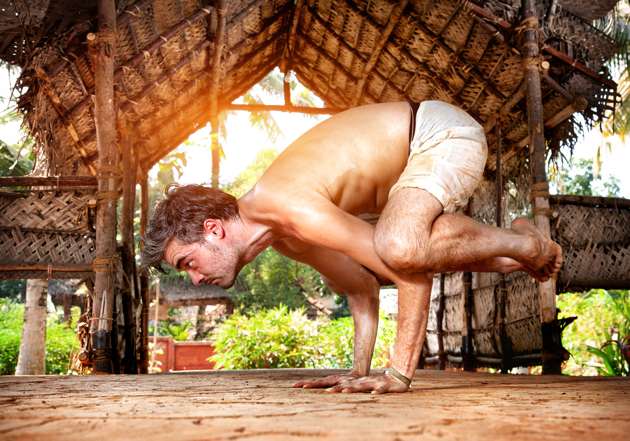
As a Vinyasa Flow teacher, I get my fair share of questions about wrists and yoga wrist pain. And for vigorous styles of yoga such as Vinyasa or Ashtanga practices, the wrists certainly get a lot of use in yoga push-ups and Planks, not to mention arm balances and some inversions.
Sometimes, the more wrist-dependent yoga poses offer opportunities to strengthen your wrists, and if you’re new to yoga, wrist pain might really be soreness that will change once you’ve developed a steady practice.
However, if these poses are not done safely, they can also make you vulnerable to injuries and chronic pain, so it is worth paying attention to the wrists in your practice. Becoming aware of your weight and your wrists takes practice. When you have a daily yoga practice, you’ll get used to holding your body in poses for a period of time without injuring yourself. Without a regular practice, you might move forward too quickly with a strong pose and hurt yourself in the process. To get to know your body better and learn more about the practice, I suggest you sign up to the free 30 Day Yoga Challenge. You’ll increase your strength and get into a regular routine.
Poses Can Bear Weight on the Wrists
If you don’t already have existing wrist issues before you get on the mat, wrist pain can often flare up because of misalignment in certain wrist-sensitive aka weight-bearing yoga poses.
Some quick culprits tend to be Plank, Side Plank (Vasisthasana), yoga push-ups, arm balances, and even Downward Facing Dog (Adho Mukha Svanasana). Further, being on your hands and knees can aggravate wrists if done without proper awareness.
Over time, repeated misalignment will wear and tear on the joints, ligaments, and tendons of the hands and wrists, so much that poses like Downward Facing Dog and Side Plank, where the weight is on one wrist, seem excruciating.
Bad Form and Your Wrists
Do any of these scenarios sound familiar to you? In Plank, your shoulders are far forward past hyperextended wrists as the hips sag, which shifts much of your body weight onto the shoulders and wrists.
Or in Downward Facing Dog, your hands aren’t fully grounded on the mat, and the knuckles of the thumbs and index fingers lift away from the floor, unevenly distributing more of your weight to the outer edges of your hands.
Or, lastly, in any weight-bearing pose, your hands are not aligned center, but torqued uncomfortably. These imbalanced positions can put excessive pressure on the small bones of the hand and surrounding ligaments and tendons, which have limited flexibility to begin with.
Ultimately, they increase your risk for painful strains, tears, or breaks.
If these kinds of scenarios happen in your practice, you’re not alone. You’re not a lost cause—you can still take charge of your wrist health. In my mat time, I’ve found that practicing a few safety precautions make my wrists (and me) much happier and stronger.
Try these tips so you can stay happy and free of wrist pain for as long as possible.
1. Check your alignment and be honest.
A general rule of thumb, though by no means true for every single situation, is that shoulders are aligned over the wrists in weight-bearing poses to minimize hyperextension. Aim to be firm and light in these poses.
This means you are stable in the pose, but not so heavy that if feels like you’re smashing the heels of your hands into the floor.
2. Practice ahimsa and modify the pose as needed.
Ahimsa means non-harming, and if your wrists feel compromised, you may need to back off and modify the pose to suit you.
Drop to your knees in a modified Plank or low push-up (Chaturanga), bend your knees in Downward Facing Dog (Adho Mukha Svanasana) to shift your weight off the wrists, or even come down to your elbows in Side Plank (Vasisthasana), Plank or Downward Facing Dog if necessary.
And don’t be afraid to ask a knowledgeable teacher for tips on modified poses, too.
3. Take your time.
A leading factor in yoga wrist pain can often be because you might move into poses too quickly without making sure your hands and arms are in the right alignment before you put weight on them.
Though fast-moving Flow classes may not spend as much time on alignment points, you can still practice safe alignment in your poses. It might mean you’re a beat or two off the class’ pace for a while, but with dedicated practice, it will become second nature to come into healthy alignment smoothly.
Plus, you’ll find the pace that works for a healthy, happy practice for you.
4. Enjoy wrist therapy.
After mat time, it can help to take some gentle counter stretches such as flexing and rotating the wrists or, among my personal favorites, evenly massaging the forearm from the elbow crease to the wrist and hand.
The major muscles responsible for moving the wrist are all wrapped around the radius and ulna of the forearm, so often the tension can move up along the arm if pain is ignored.
5. Rest if or when there is pain.
Along the lines of practicing ahimsa, again, if your wrists feel achy and strained, sometimes the best medicine is simply rest. You can try a different practice that doesn’t spend as much time on the wrists or emphasizes therapeutic healing techniques for them.
What other yoga poses cause pain in your wrists during practice? Feel free to post them below!


