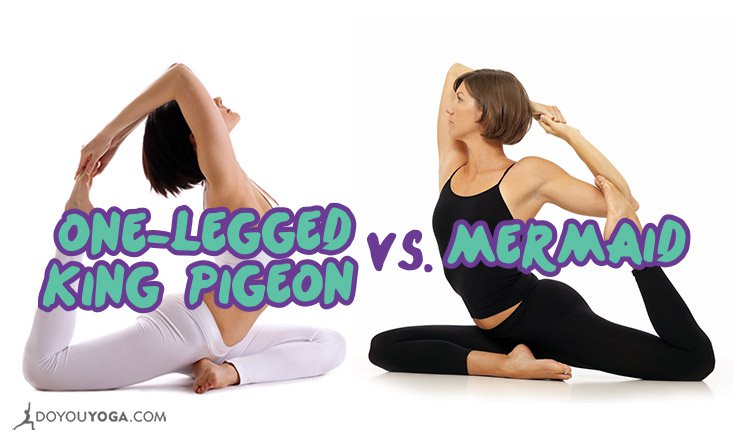
One-Legged King Pigeon Pose or Eka Pada Rajakapotasana and Mermaid Pose both evolve from Pigeon Pose, which is why they both begin the same way and require the ability to safely bend the back.
The Difference Between Mermaid Pose and One-Legged King Pigeon Pose
Mermaid shifts off to the side, and serves as a great starting point before entering One-Legged King Pigeon, which will feel more centered.
While these variations work well together, you don’t have to do them in succession. In fact, focusing on just one per practice can keep you from overusing the same muscle groups. Below are some tips to help you warm up properly before executing these variations.
Preparation and Safety Tips
1. Shoulders
Shoulders work as synergists or movers for the chest muscles (pectorals) and back muscles, specifically the latissimus dorsi. Prepare for this pose with a sequence full of heart openers (Bridge and Wheel variations) and side body lengthening postures (Trikonasana).
2. Hips, Psoas, and Quadriceps
The iliopsoas and quadricep muscle groups work together to stretch the back leg during One-Legged King Pigeon, while the front leg primarily stretches the external rotators as well as the muscles and tendons that run along the lateral side of the leg.
Ideally, both hips face the front of the mat to ensure balance in the spine. Note, however, that squaring off the hips forcefully may create pain and even injury in the lumbar spine, sacroiliac joint, knees, and ankles.
Each practitioner has his or her own unique bone structure and range of motion in the hip socket, so listen to your body and heed any pain as a warning that you’ve gone too far. Consult your teacher for assistance in finding your “ideal” alignment.
Some helpful preparation poses: Half Lotus and Half Frog Pose.
3. Ankle and Knee Stability
The joints in the lower part of the back leg during these poses must move together. You don’t need to contort yourself. Practice patience, and if you feel the need to twist your knee or sickle your ankle too far off to either side, you may risk spraining a ligament.
The joints do not need to stretch: they provide stability and structure. Sensation in your joints usually indicates overstretching and is an indication to stop. Practice building strength and stability in the Warrior Poses and Chair Pose.
Setting Up: Getting into Pigeon Pose
- From Three-Legged Dog with the right leg up, bring the right knee forward between the hands.
- Settle into Pigeon by adjusting the front foot—heel closer to the pelvis for tighter hips and groin, or right shin more parallel to the short edge of the front of the mat if you feel more flexible.
- Do not twist the ankle and refrain from holding any position that creates pain in the knee joint.
- Align the left leg, keeping the front of the foot pressing into the mat and gently rotating your left hip bone forward.
- While squaring off the hips sets you up for an “ideal” posture, make sure that when you make this adjustment, the low back, knees, and ankles remain pain-free; otherwise, proceed slowly. If you don’t feel comfortable in this portion of the pose, please do not progress towards the following variations. You have plenty of time to evolve your practice. Stay compassionate to yourself.
From Pigeon to Mermaid
- From Pigeon, bend your left knee, moving your heel toward your glutes.
- Reach for your left foot with your left hand, slightly moving your foot to the lateral side of your left leg and eventually hook your left foot in the crook of the elbow.
- Extend your right arm upwards, lifting tall through the spine, and interlace your right fingers with your left.
- Look down toward the left foot or straight ahead, careful not to tilt your neck too far off to one side.
- Release after five to 10 breaths and repeat on the other side.
From Pigeon to One-Legged King Pigeon
- From Pigeon, bend your left knee, moving your foot toward your spine rather than shifting off to one side as you would do in Mermaid.
- Extend both arms overhead, keeping the spine tall.
- Bend your elbows, reaching back for your foot. Make sure you keep your foot active (slightly flexed or pointed) to protect the ankle.
- Lift your gaze toward the sky without collapsing the cervical spine.
- Release after five to 10 breaths and repeat on the other side.
These are advanced poses that you can build over time as you increase your overall flexibility and strength.
Deepen your practice slowly, without too much force or ambition, and you will reap the benefits of spinal flexibility and chest and shoulder stretching, as well as the core work needed to maintain your balance for years to come.


