The Revolved Side Angle Pose has a great deal of twisting and stretching going on, making it a nice addition to your practice! Start with one of the modifications and slowly build yourself into the full pose.
Benefits
The Revolved Side Angle Pose strengthens legs, opens the hips, and it exercises our feeling of balance. It will give your spine a good twist, and it stretches the shoulders and upper arms. Play with the pose and enjoy the strong feeling of balance and accomplishment it can give you!
Step-by-Step

- Start by standing on your knees, and take your left leg in front into a 90 angle.
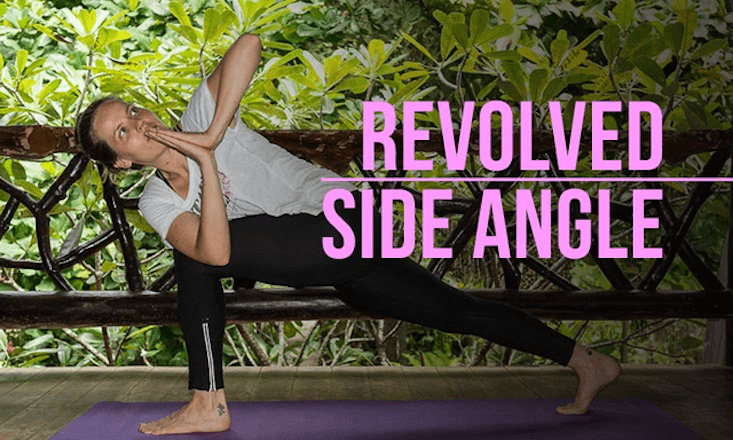
- Lean your body towards your left leg, and twist towards the left.

- Bring your right elbow past your left knee, and place the hands in prayer position.
- Straighten the back leg and leave the heel open.
- To enter the full pose, place your right hand on the floor (or on a block) on the outer side of the left leg, and bring the left arm up towards the ceiling. If this feels comfortable, you can bring your right arm further to form one line with the rest of the body.
- Keep your neck neutral, or if you feel comfortable, turn your gaze upwards.
- Stay for 3 to 5 long breaths and slowly come out by releasing the twist first. You can either place your back knee on the floor again, and change legs. Alternatively, you can place both hands on the floor, come up to downwards facing dog, and change legs.


Tips and Modifications
- For beginners, you can first exercise the pose with the back knee on the floor (steps 1 to 3). As you progress, lift up the back knee, and stay in this pose until you feel stable enough to bring the hands to the floor and up.
- Place a block next to your front foot for ease when taking your hands from the prayer position into the full pose.
- You can keep the heel open throughout the pose. If this feels easy, you can place the back heel on the floor at an 45 degree angle, like in Virabhadrasana I.
- Keep your gaze towards the floor or look straight ahead if your neck feels tight or if you have had any neck injuries.
- Avoid the pose if you have injury in the hips.
With patience, notice how the balance comes and how the stretch deepens each day. Have fun with it!