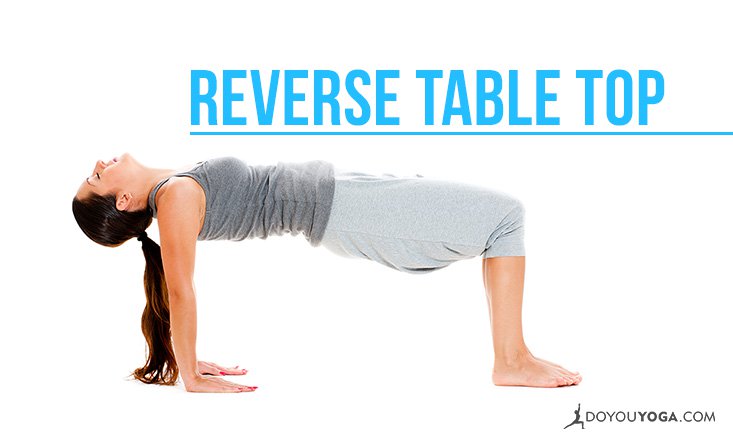
Ardha Purvottanasana or Reverse Table Top Pose is easy to approach and it gives plenty of wonderful benefits. The modern life tends to leave us more hunching forwards, whether studying or working on a desk or sitting long days, and the front of the body gets tightened and the shoulders tend to get tense.
A great counter act for this is to open up the front of the body, to open up the heart and give more space for life in the body.
Sometimes back bends that aim for this front side opening can be too advanced or uncomfortable to do, which makes the Reverse Table Top a great pose for the same, wonderful benefits.
Benefits of Ardha Purvottanasana
The Reverse Table Top Pose, also called Half-Upward Plank Pose, is a great counter pose in-between forward bends, but it has many benefits on its own. It stretches the front side of the body and the shoulders, and it strengthens the arms, wrists and the legs.
Because of the opening it gives to the front of the body, the pose improves posture and gives you a nice boost of energy.
Step by Step
- Start in Dandasana, sitting with your legs straight in front of you.
- Bend your knees so that both your feet are on the ground. Leave some space between your hips and the feet, so that when you come up, your knees would be in a 90 degree angle.
- Place your hands behind you on the mat, shoulder-width apart, fingers pointing towards you, and lean back.
- With an inhale, lift your hips while you are pressing firmly onto your hands and feet. Straighten your arms, and check that your knees are at a 90 degree angle and thighs and torso are parallel to the floor. Your wrists should be directly underneath your shoulders.
- Move your shoulder blades close to each other, and open the chest.
- You can keep your neck neutral, or you can gently begin to drop the head if this feels comfortable for your neck.
- Try to relax the buttocks and keep the pose only with the strength of your legs.
- Hold the pose for 4-6 breaths, and release the hips back to the ground. Straighten the legs back to Dandasana.
- You can repeat this pose 2-3 times.
Tips and Modifications
- If you have issues with your wrists, better not practice this pose. The pressure on the wrists can be heavy as the wrist are bent 90-degrees.
- With any issues or pain in your neck, keep your neck neutral or keep the chin closer to the chest. Do not drop the head backwards.
- You can place a block or a bolster under your hips so you can rest part of your weight on the block. This will make the pose a bit easier to do.
Note: Avoid this pose if you have any pain or discomfort in the shoulders.
Practice this great and accessible pose as a quick counter pose from deeper forward folds within your sequence, or practice it on its own sake after a long day of sitting. Enjoy the space it creates in you!