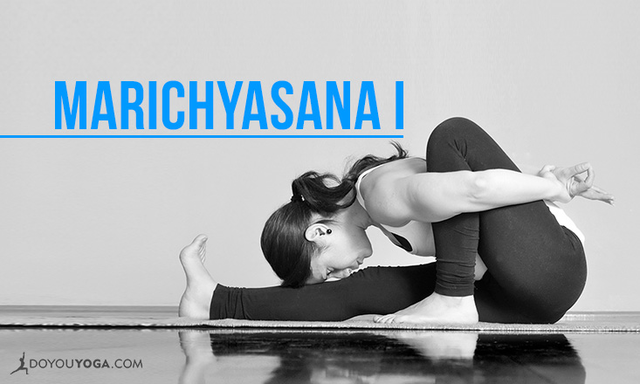
Marichyasana, the Marichi's Pose, takes its name from the Sanskrit word Marichi, which means a ray of light. In the Indian mythology, Marichi was one of the sons of Brahma, the divine creator, and Marichi was made to become the ruler of the 'shining ones.'
The Marichyasana itself has four variations, which can get somewhat confusing. The first and the third version have one leg straight on the ground while either folding forward or twisting the torso. The second and the fourth version include folding the bottom leg on the thigh of the bent leg, and performing the same Forward Fold or a twist with the upper body.
Marichyasana I is also called Marichyasana A in the Ashtanga Vinyasa System.
Benefits of Marichyasana I
Marichyasana is a forward extension, and as such, it calms the mind and the body. It stretches the shoulders, massages the internal organs and improves digestion. This pose rotates the pelvis and the shoulders slightly into opposite directions, creating a mild twist in the upper body.
Steps for the Full Pose
- Start in Dandasana, sitting with your legs straight in front of you. You can fold a blanket underneath your hips, or roll half of the yoga mat to bring your hips a bit higher.
- Bend your right knee, and bring the heel as close to the sitting bone as feels possible. Your right foot is flat on the ground, and the left foot is straight, left knee and toes are pointing up. Press the heel of the left leg onto the floor to activate the back of the leg.
- You can keep a slight internal rotation in the left leg, while the right, bent leg has a slight external rotation. Turn your upper body gently towards the left, so that the right shoulder rotates towards the left leg, and the left shoulder rotates back.
- Inhale your right arm up to shoulder level, and turn the thumb down. Exhale, start folding forward, and bring the right arm from outside your bent leg towards the right outer thigh.
- Inhale, and with an exhalation bring your left arm behind your back, and take a hold of your wrists or fingers behind your back.
- Keeping your back long, and keeping space between your pubic bone and navel, fold more forward. Draw your shoulder blades back towards your hands.
- Stay for 3-6 long breaths.
- To come out, release the hands first, sit up slowly, straighten the leg and take a few breaths before you repeat on the other side.
Tips and Modifications
- If you don't reach to take a hold of your hands behind your back, you can clasp the fingers together, or use a belt to gain a bit more space. Alternatively, if you have more space, you can clasp your wrists, or try to straighten your elbows a little bit and lower your arms behind you.
- Keep a block or a folded blanket underneath the hips for tight hamstrings.
- This pose should be performed after some preparatory poses including both twists and forward folds.
- Avoid this pose if you have headache or a migraine, if you suffer from injuries of inflammation on the lower back, or if you have irregular blood pressure.
This pose is named after a ray of light, whether the light of the sun or the moon. What a perfect moment to pause and remind yourself what a ray of light you are, and to ask yourself how you could cultivate that light even more in your life.


