The wrist is a complex joint made up of several bones, ligaments, tendons and muscles all working together to contribute to a multitude of movements. An integral part of yoga, strong and flexible wrists are crucial to many poses requiring flexion, extension, abduction or adduction.
It’s hard to imagine Vinyasa Yoga without wrist involvement, due to the prominence of Sun Salutations and weight-bearing positions on the arms. Flowing from Chaturanga to Upward Dog to Downward Dog creates a lot of pressure on the wrists, even with perfect alignment. Below, we’ve highlighted modified versions of wrist-centric poses that will lighten the load on the joint while still reaping the benefits of each posture.
1. Plank Modification: Forearm Plank
 Credit: Kristin McGee
Instead of full Plank with hands on the mat, try Forearm Plank. Body weight will be distributed to the hands, forearms and elbows alleviating the impact on the wrists. Bring the forearms to the ground making a 90 degree angle at the elbows. The angle will set up the proper alignment, with shoulders above elbows and elbows in line with wrists. Step the feet back into normal Plank position and engage the core.
2. Side Plank Modification: Forearm Side Plank
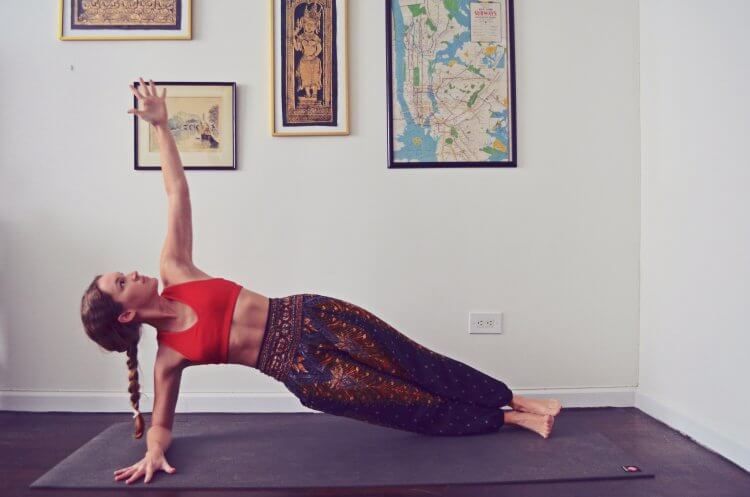
Similar to Forearm Plank, Side Plank performed on the forearm is an effective way to protect the wrists. Starting in a grounded position on the right side-body. Bring the right forearm to the mat with the hand reaching toward the left edge of the mat. Align the shoulder above the elbow and stack the left ankle on top of the right. Flex the feet, press through the forearm, lift the hips and reach the left arm up.
3. Chaturanga Modification: Knees-Chest-Chin (Ashtanga Namaskara)
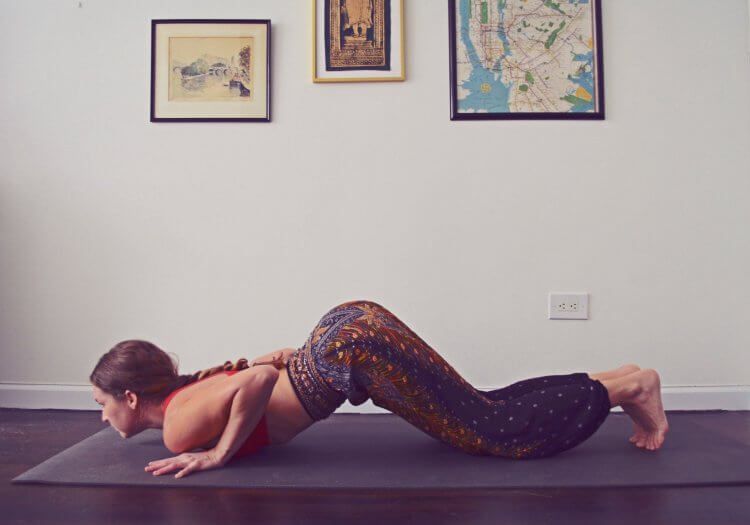
Yoga’s reverse push-up, Chaturanga, can be intense on the wrists as a load-bearing exercise requiring complete wrist extension. An alternative is a position with knees, chest and chin lowered to the mat. From a Table Top position on all fours, come into Cow Pose (sink the belly toward the ground, reach the tailbone up and slightly gaze upward). From here, bend the elbows in toward the ribs, keep the hips high and lower the chest and the chin to rest lightly on the ground. If this is even too much pressure on the wrists, lower back or shoulders, simply skip this step and move straight to #4.
4. Upward Dog Modification: Sphinx

Upward Dog’s main purpose is to provide an opening through the chest and back. Sphinx Pose accomplishes this without straining the wrists. From a prone position, prop up your torso by bringing the forearms to a 90 degree angle (again, elbows directly below shoulders). Spread your fingers wide reaching toward the top of the mat. Elongate through your collarbones and draw your shoulder blades back and down along the spine. Your forearms should be pressing the floor away drawing the chest up further.
5. Downward Dog Modification: Supported Down Dog
 Sometimes Downward Dog places a lot of stress on the wrists from weakness and inflexibility in the legs and back, forcing more pressure into your arms (and wrists) as the body shifts forward more than desired. One way to help negate the collapse of weight into the wrists is to elevate them by folding the mat and placing the heel of your hand on the elevated portion. This will alleviate the stress on the wrists by redistributing the weight throughout your hands.
6. Arm Balance Modification: Supported Crow

Balancing on the hands is a tough feat. Some arm balances, like Crow Pose, require complete 90 degree (or more) extension of the wrist joint. This extensibility in itself is challenging, even before adding your full body weight on top of that.
To modify Crow (and other arm balances), it may be helpful to reduce the angle of the wrist by propping up the heel of the hand. Simply fold your mat over to create a shelf for the base of your palm while still leaving space for the rest of the hand (including fingers) to firmly grip the mat. The hands should be shoulder-width apart and the fingers should be spread wide with your weight evenly distributed across all corners of your palm, all of which will contribute to protecting your wrists. When ready, snuggle your knees as far up your arms as possible and then shift your torso forward and your hips up. Look center just past your fingertips, lift one foot and then possibly the other with heels reaching toward the buttocks. Work on distributing weight evenly throughout your hands and strongly engage your core.
7. Wheel Modification: Bridge
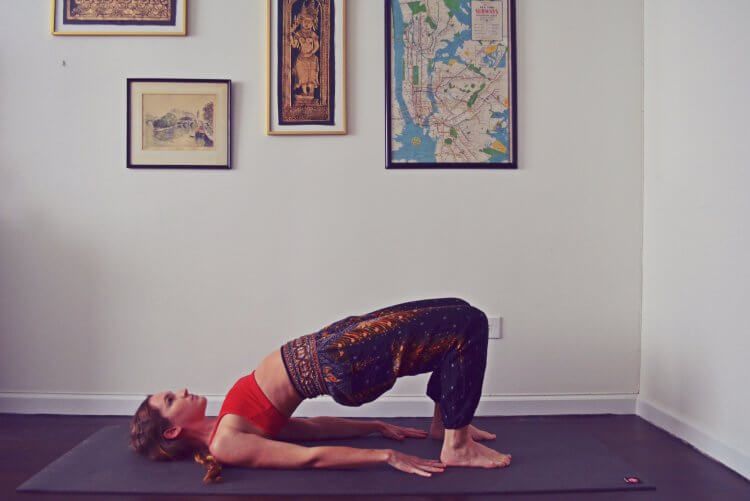
Wheel Pose also puts the wrists in a vulnerable extended position. One option to ease tension on the wrists in full Wheel is to elevate the heel of the hands as depicted previously. However, if this is still uncomfortable, Bridge Pose may be a more practical and supportive alternative. From a supine position, bend your knees and bring the soles of your feet to the ground. Reach your arms long toward your feet, allowing your fingertips to just barely touch your heels. Press firmly into your hands and feet and then lift your hips away from the floor. Keep your neck in a neutral position.
Stretching
As always, stretching and strengthening go hand-in-hand. Stretches like wrist circles will alleviate soreness as well as build up weight tolerance. Wrist mobility will also afford more intricate articulations of the hands and more diverse range of motion for poses such as arm balances. As for gaining wrist strength, it does not take much. Even in non-weight bearing poses, the wrists can still be strengthened by engaging the hands and spreading the fingers wide without any undue pressure on the wrists.
Make sure to honor your body and heed caution if you’re feeling sore. If you suffer from weak wrists, take appropriate modifications but keep in mind that it could be something else! The wrist connects the forearm and hand, but the interconnectivity doesn’t stop there. The body and all of its parts are connected, and building strength and flexibility in another muscle (say the core, shoulders, triceps) may result in stronger wrists and can shift pressure away to other muscles.
Final takeaway? Just remember that any pose that requires hand-to-mat contact can be modified to reduce the impact on the wrists, whether it be through forearm-to-mat contact, reducing the flexion/extension angle, or using a different pose that targets similar muscle groups.


