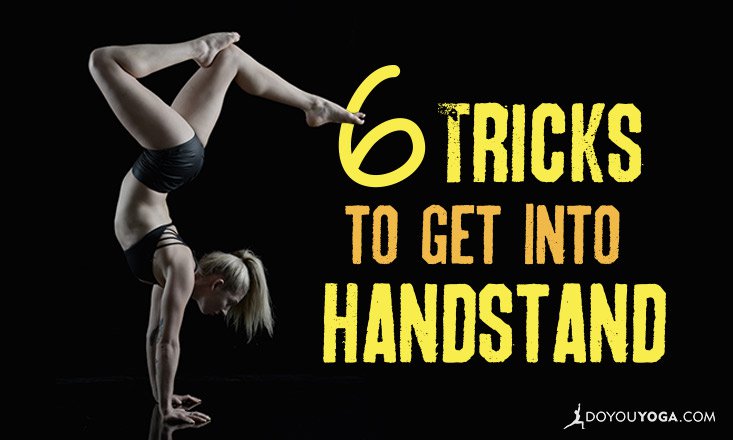
Why handstands? As in my previous post, the handstand is a powerful and profound pose, psychologically even more than physically. There are many poses that are more challenging to your balance, strength and flexibility, but few that demand your emotional and mental qualities in quite the same way!
One aspect is fear: a general discomfort with going upside down can be significantly increased by the fact that your head is off the ground, floating in space, with only the hands in contact with the floor.
Because the pose can inspire such fear and resistance, it offers equally powerful benefits: you get confidence, courage, and independence immediately after even just a few moments of this arm balance.
The following tips are things I discovered in my handstand journey and only learned by experimentation and word of mouth; hopefully, they’ll help you get into handstand too.
Setting It Up
First, test your strength: you want to be sure your shoulders and wrists are strong enough before you go upside down. This will also help build your confidence and is a preliminary practise: you’ll still get the benefits of the inversion, while gently training your mind to become familiar with the strange charm of going upside down.
One way is to hold a good Adho Mukha Svanasana for at least a minute. Once you’re happy there, you can practise half-handstand or L-shaped handstand.
 Here’s how to do it: first, sit with your legs straight out and heels touching the wall. Then, get up and place your hands where your sit bones were and your feet on the wall — hips at a 90-degree angle.
If you can hold this for five slow breaths you’re ready! Don’t worry if you find this impossible, I did for a long time, and substituted my hands closer to the wall to practise lifting one leg at a time over my head.
The purpose here is still to get familiar with bringing the hips over the shoulders – it’s the key to all inversions and highly beneficial to the circulatory, lymphatic and nervous systems, not to mention developing strength.
1. Walking the Walls
Practicing along a hallway can be really helpful, it just requires a decent space between two walls – wide enough and narrow enough to walk the feet up.
If a hallway is not an option for you, a doorway is another useful structure: place your head and shoulders against the door jamb and walk the feet up the other side until you’re vertical. But do beware – coming down is the harder part, make sure you walk down slowly and with control BEFORE you need to. If you fall out of it, you’ll likely bruise your knees and your ego.
Another option: Phone a Friend. Placing your hands a foot away from the wall you’re rising up, lift up one leg straight. Your friend places their hands under the thigh of the lifted leg to make a shelf and bends their knees to protect their back. You then press into this straight leg to lift the other and once again bring the hips over the shoulders and feet to the wall.
2. Use Bolsters
It’s nice in a studio if there are pads and bolsters, and be sure to still use your mat for your landing. Try a bolster – or if at home, a couple of pillows – vertically against the wall. The magic of this is that your head is still in contact with something, which can relax the fear factor enough to get you up.
I started with three pillows deep, and this makes sense because if you’re too close to the wall you’ll never get your hips over your shoulders. With your hands shoulder-width apart and straight, strong, and engaged, pushing up out of the ground as one would in Down Dog.
With all of the above – and this is crucial – you need to be sure you’re starting with straight, strong arms. If your arms are bent to begin with, not only are they weaker (increasing the chance of landing on your head) but you’ll never be able to straighten them once you’re upside down.
This is your foundation and your arms need to be as powerful as your legs would be in a standing pose: grounding into the palms and fingers spread increases the area your weight will dissipate into.
3. Momentum
Many people who can do handstands are used to firing themselves into them a la gymnastics. For months, I mistakenly attempted to lift my legs in the yoga equivalent of a standing start. But just because we start with our hands on the floor doesn’t mean we don’t still use all the energy of hurling ourselves into it.
Here’s the trick: bend one leg as much as we need to, keep the other one straight, and then springing out of that bent leg to hurl the top leg, and the hips, at the wall.
Equally crucial is keeping the top leg straight, so when you hurl that leg towards the wall behind you, the momentum of your top leg’s weight works for you instead of against you. If you focus on getting the bent/springing leg up to the wall, you just might find it happening.
4. Exhale
So your hands are positioned shoulder-width apart, your arms are strong, you have one leg bent and ready to spring, one leg straight and ready to swing. With all that going on, it’s easy to forget to breathe.
But the breath, as always, is critical and can give you the engine and space to let you rise up. As with an Ashtanga jump-back, an exhalation protects the lungs under the pressure of effort. In this case, it has the added benefit of potentially fooling your brain into relaxing, or at least distracting your habitual mind enough to get out of the way.
A few little hops to get the rhythm going and then phoosh! Exhale and hurl at the same time and you just might find those feet on the wall.
5. Alignment Checks
First, check that you’re not over-arching your back. Breathe in long, slow breaths, aiming to count 10 of them.
You may explore letting one foot and then the other float away from the wall and you may discover that magical space where your body feels almost weightless – a perfect stillness, even just for a second – before you breathe again.
6. A Clean Exit
Whenever you’re ready, ideally after a set number of breaths, bend one leg and let that weight lightly float you down. Plunge into Balasana – let the effects of your effort flow through you until you can feel your heartbeat and breath have returned to normal.
Everyone is going to find one side easier, and it’s critical to keep working on the “weaker” side. That’s what yoga can do for us: instead of reinforcing the habits and conditions we’re comfortable with, we can dive into the dark and scary parts of our own bodies and minds, to discover they’re not so scary after all.
In fact, they’re pretty fun! Handstand gives subtle power, confidence, and the joyful knowledge that we can support ourselves and stand up on our own two hands!