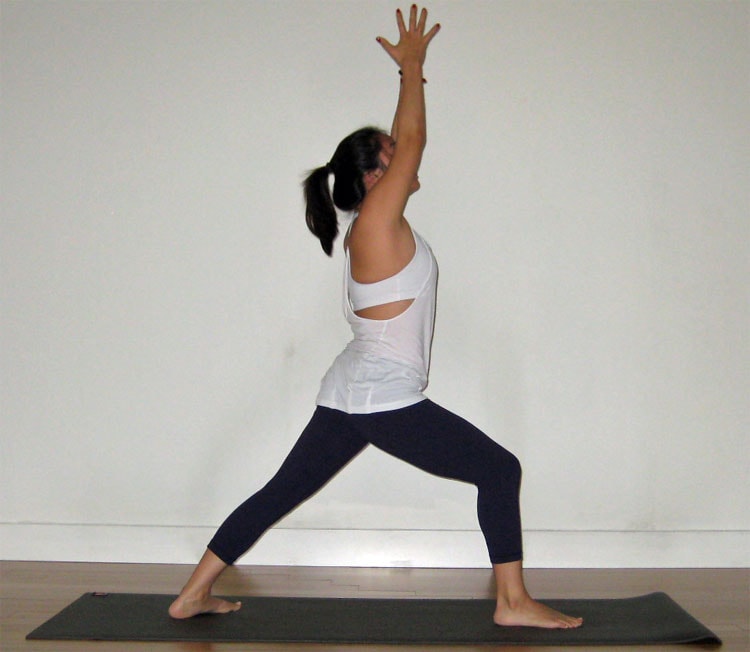
While Warrior I pose (Virabhadrasana I) is one of the main components of Sun Salutation (Surya Namaskar) B, there are so many beautiful and creative ways to integrate this strong, grounding pose into your practice. Nowadays, I love practicing the Warrior series because it reminds us of the fierce power we can harness within us while remaining grounded in our strength. Remember — we are warriors, not worriers!
Benefits Of Warrior I Pose
Warrior I pose strengthens the legs, ankles, arms and shoulders, and stretches and opens the groins, hips, chest and shoulders. A strong standing pose, Warrior I helps to develop stamina and endurance in your legs and core, and can help to improve balance and concentration.
Warrior I Pose Step-By-Step
- Begin standing at the top of your mat in Mountain pose, or Tadasana. On an exhale, step your left foot back about 3 ½ to 5 feet (depending on the length of your legs and the level of openness in your hips).
- Turn your left toes out approximately 45 degrees, and place the sole of your foot flat down on the mat. Press down firmly through the pinky toe edge of your back foot, and align the left heel with the right heel.
- Bend into your right knee, ensuring that the knee is stacked directly over the ankle and isn’t splaying to the left or right. Move toward squaring your hips and shoulders towards the front of your mat, and lengthen your tailbone down to maintain a neutral pelvis.
- On an inhale, extend your arms up alongside your ears. Either keep the palms shoulder distance apart or bring the palms together to touch, and send your gaze up between your hands or to your thumbs.
- Relax your shoulders away from your ears and draw the low ribs in, keeping the core engaged.
- Remain in the pose anywhere from 5 to 10 breaths.
- To come out of the pose, either lower the palms and make your way into Downward-Facing Dog, or step back up to the top of the mat. Repeat on the other wise whenever you feel ready.
Tips
- If there is any pain or discomfort in the back knee while keeping the back heel grounded and squaring the hips forward, then the pose can be modified by lifting the back heel and pointing the toes forward, like a lunge.
- To deepen the pose, try coming into Warrior I, then reaching back and interlacing your fingers together. Inhale to find length along the spine, then on an exhale, hinge at the hips to come forward and down to the inside of the front knee. This creates a beautiful opening in the groins and shoulders!
- While traditionally the pose is practiced with heel-to-heel alignment, the feet can be separated to be slightly wider to create a more stable foundation.
- You can continue to refine the pose by drawing the pinky finger edges of your arms in slightly toward the midline of your body to broaden your shoulderblades across your back, and move toward bringing the front thigh parallel to the ground.


