Sirsasana, or headstand, has been referred to as the “King of Asanas.” It tends to be the first inversion that many students learn as it provides a very stable base from which to turn ourselves upside down. Aside from building confidence, headstand is also beneficial for calming, toning and strengthening, and improving digestion.
For first time headstanders, there can be reservations around practicing this pose, particularly without the right tools or guidance. While strength is certainly one hindrance to practicing headstand, more often than not, it is also fear. Fear typically arises as a result of the unknown. It is thus helpful to understand the foundation of the posture (and for any intermediate posture for that matter), as well as knowing the entries and exits.
Work on the following steps to build your confidence and eventually master your headstand.
1. Strengthen and Stabilize the Shoulders.
 Image credit: Ania
When it comes to inverting, most people immediately think core strength. While core strength is certainly a component of moving your legs from the floor to above your head, your shoulders provide stability in the foundation of the posture. Strong and stable shoulders help to keep the rest of your body moving up and away from the ground.
Practice Dolphin posture with your palms together and fingers interlaced (similar to your hand placement in Sirsasana). Focus on actively squeezing the palms together, pressing the forearms into the floor, and hugging the upper arms towards one another. Finally, externally rotate the shoulders, keeping the collarbones broad.
2. Strengthen the Hip Flexors and Core.
 Image credit: Ania
There are a few entries into headstand and one that is often used by beginners is walking the feet towards the elbows until the hips are above (or nearly above) the shoulders. Once the hips are no longer able to move more forward and up, pull one knee at a time in towards the chest. Maintaining the knees into the chest calls upon the strength of the hip flexors, and thus, also the core.
Practice Boat Pose (Navasana) with the knees bent, focusing on maintaining a neutral spine. With every exhalation, narrow the space between the front of the abdomen and the front of the thighs.
3. Lengthen the Hamstrings (and Descend the Femur).
 Image credit: Ania
Looking again at entry points into headstand can give us an idea of what we can do to prepare us for successfully getting our feet off the ground, and possibly up and over our head.
Walk the feet forward towards the elbows, and instead of bringing the knees into the chest as was outlined in the last step, lift one leg up, completely straight and active, towards the ceiling. With the bottom leg, think of drawing the femur (thigh bone) into the pelvis, activating the hip flexors and the lower part of the abdomen.
This entry is a one-leg press, which has the potential to progress into a press-headstand but does require an opening through the back body to bring the hips over the shoulders.
Practice Forward Fold (Uttanasana) or any variation thereof, and as you ground the soles into the mat, think of countering by drawing the sits bones upwards or drawing the heads of both thigh bones into the pelvis. Standing splits will also lengthen the hamstrings, while helping you to connect to the action of hugging the thigh bone into the hip.
As you enter standing splits, draw the outer hip of the standing leg back, and further square off the pelvis by drawing the thighs together and lifting the inner thigh of the lifted leg towards the sky. With the lifted leg, plug the head of the thigh bone into the pelvis.
4. Strengthen the Adductors of the Legs.
 Image credit: Ania
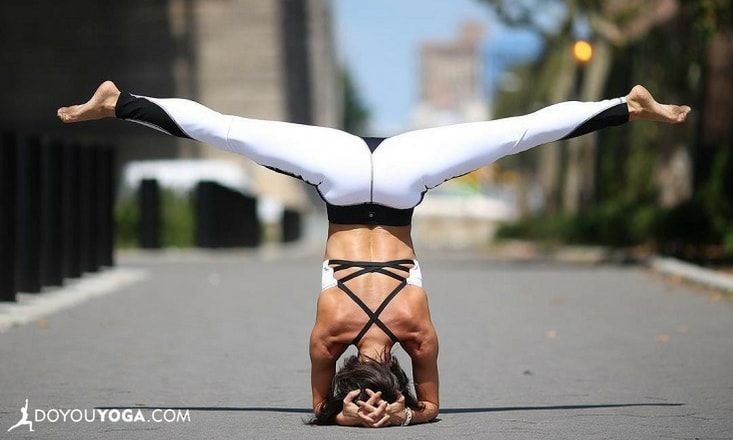
Once you are able to bring your legs to stack over your hips, head, and shoulders, you have to work against gravity which will want to bring your legs apart and down. This can be done by squeezing the legs together and in towards the mid-line, or adducting of the hips.
In Tadasana, Utkatasana, and Plank, place a block between your thighs, and begin to squeeze the thighs into the block, while engaging the buttocks. In each posture, maintain for 5 breaths before releasing and resting in Balasana or Tadasana (without the block).
5. Create Engagement of the Front Body.
 Image credit: Alissa
Learning how to keep the spine neutral through core engagement will prove useful whilst you’re inverted. Engaging the core will keep the lumbar spine from over-extending, and furthermore, preventing any ‘dumping’ or what we call ‘banana back’.
In Tadasana, Table Top, and Plank, find complete length in the spine moving the crown of the head away from the collarbones. Then actively draw the navel in and up, while knitting the front ribs in and down. Maintaining these two actions, lengthen the sides of the waist away from the pelvis.
Beginning a headstand practice with a greater understanding of how to enter and exit, in addition to understanding what the body is doing in space, will give you more confidence.
Practicing the previously outlined steps will help to prepare your physical body for headstand, and focusing on your breath while practicing said steps will also prepare you mentally.
If you are working with fear, using a wall can help build confidence while keeping you upright as you work to stabilize your body. But if in any doubt, practice alongside or with the help of your yoga teacher.
Image credit: Dina Ivas