Thread the Needle pose (Sucirandhrasana), also known as Eye of the Needle or Figure 4 pose, is much less intense than Pigeon pose, but just as effective for opening the hips, and safer for those with any limitations such as knee or hip issues. I love to sequence this pose toward the end of a class as a way to cool down and move deeply into the connective tissues of the body, but it’s also just as nice at the start of class to warm up and begin to open and bring awareness to the hips and legs. Try practicing the pose both at the start and the end of class and notice what difference you feel in the sense of spaciousness in the body.
Benefits Of Thread The Needle Pose
Thread the Needle pose is a safe and effective way to stretch the hips, particularly the piriformis muscle. Releasing tension in the hips helps to create a sense of physical ease throughout the entire body, particularly in the knees and low back, as well as mental ease and clarity. Practicing Thread the Needle pose often can produce a marked sense of openness in the hips in preparation for deeper poses such as Full Lotus (Padmasana) and Pigeon (Eka Pada Rajakapotasana). This is also great prep work for arm balances like Flying Pigoeon (Eka Pada Galavasana) and Grasshopper!
Thread the Needle Bend Pose Step-By-Step
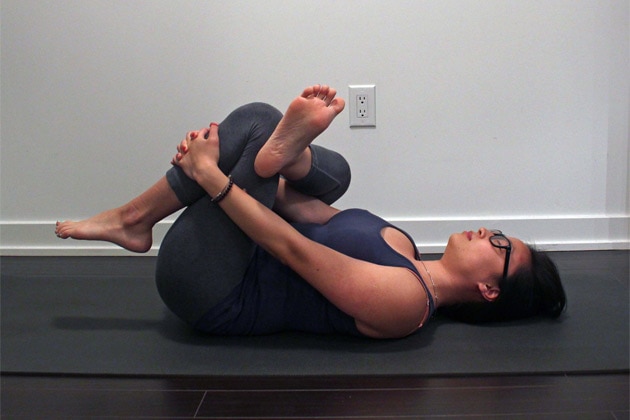
- Begin lying comfortably on the back. Bend your knees and place the soles of your feet flat down on the mat, about hip-distance apart. Walk your heels in toward your body until you can just graze the heels with the fingertips.
- Cross your right ankle on the left thigh, just below your bent knee, keeping the right foot flexed and active so that the toes of the right foot are pointing back toward the right knee. Ensure that you keep your right foot flexed throughout the duration of the pose in order to protect the knee joint from injury.
- Lengthen your tailbone down toward the ground to maintain the natural curve of the low back, and find the action of pressing your right knee away from your body.
- Thread your right arm through the space created between the legs, and interlace your fingers around the front of the left shin, or the back of the left thigh. Use the strength of your arms to gently pull your left leg closer to your chest while keeping your hips square.
- Keep the back of the head down and the backs of the shoulders relaxed down on the mat. Release any tension you may be holding in the neck.
- Remain in the pose anywhere from 5-25 breaths. To come out of the pose, exhale to release the left leg and slowly lower the soles of both feet down onto the mat. You can gently rock the knees from side to side to release any tension, then come back to center and repeat on the other side.
Tips
- If the hips feel particularly right, remain at step 3 and use the palm of the right knee to gently push the knee away from the body. If even this option feels intense, try the pose with the sole of the left foot against a wall instead, or seated in a chair. Looping a strap around the left leg as opposed to clasping the hands is also another option.
- Hip-opening poses tend to make many people clench their jaw and hold their breath because of the intense sensations that may arise. Remember to relax into the discomfort and keep breathing deeply! Not only does focusing on the breath help to promote mental stillness, it also helps your muscles to relax so that you can move deeper into your stretch and find more flexibility.