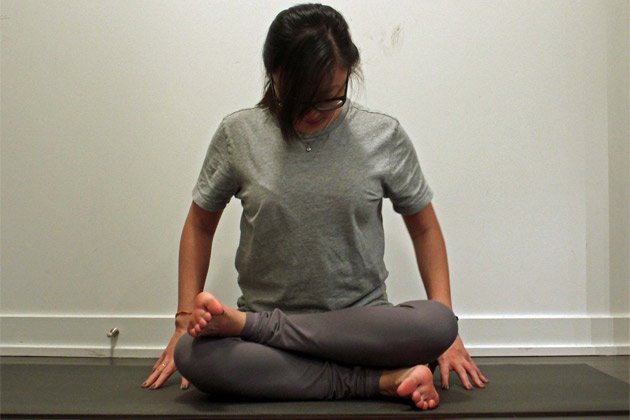
Double Pigeon pose (Agnistambhasana) — also known as Fire Log pose — is unlike many other hip-opening poses in that it creates a deep stretch for not one, but both hips simultaneously.
The act of stacking the legs on top of one another is reminiscent of stacking logs for a bonfire, and the consequent sensation may feel just as fiery and intense, too! Given the fierce physical reaction the pose may elicit, it’s all the more important to stay deeply grounded in slow, steady breath.
Benefits Of Double Pigeon Pose
Double Pigeon pose is an excellent stretch for the hips and groins, and also stretches the glutes and the lower back. As such, Double Pigeon is great for runners, bikers, DJs (desk jockeys, that is) and expectant mothers. Regular practice of this pose can make it therapeutic for stress, and aids with relaxation and calming the mind.
Double Pigeon Pose Step-By-Step:
- Begin seated in Staff pose (Dandasana), with both legs extended straight out in front of you. Sit up tall, reaching the crown of the head up toward the ceiling, lifting the chest and lighting shrugging the shoulders back.
- Bend your right knee to approximately a 90-degree angle and bring the outer edge of your bent right leg to rest on the mat in front of you. Your right shin should be parallel to the front of your mat, and your right foot should be flexed and active such that your foot is perpendicular to your shin.
- Bend your left knee, pick up your left leg and stack it on top of your right, with the idea of stacking the shins directly on top of one another. Again, ensure that your left foot remains flexed and active here to protect the knee joint from injury.
- Keep your fingertips on the mat beside your hips, and imagine you are drawing energy up from the ground and up along the column of your spine. Refine the pose even more by energetically pressing through the heels and drawing your shoulderblades down your back.
- Take a few deep breaths. If you feel comfortable moving deeper, explore the sensation of taking your hands on the ground in front of your legs and beginning to walk yourself forward over your legs, maintaining the length along the spine.
- Remain in the pose anywhere from 5-15 full breaths, then slowly and gently release your legs and repeat on the other side with the opposite leg on top.
Tips:
- If it feels challenging to stack both legs on top of one another, feel free to place one leg on the ground just in front of the bent leg (with the shins crossed), or simply to leave one leg extended. If the legs are stacked but the top knee is lifted uncomfortably high, a blanket, bolster or block under the knee is a great option.
- Notice if your jaw starts to tighten, your breathing shifts from slow and steady to short and shallow, or your brow begins to furrow. The more that you can relax into the pose and soften the experience, the more that expansion will occur in the connective tissues of the body.
- A variation of this pose can also be practiced in a chair for those with tight hips or for a stretch break in the office. From seated, cross your right ankle on top of your left knee, keeping your right foot flexed. Inhale to sit up nice and tall, finding length along the spine, and on an exhale, begin to lean the torso forward to deepen the sensation. Stay for the same amount of time on both sides.
Often in hip-opening poses you’ll find that one side feels “easier” than the other. Rather than neglecting the side that feels more challenging, commit to remaining in the pose for the same length of time on each side, and you’ll find that your hips will eventually open up and begin to find a natural equilibrium.


