I’ve been receiving requests to break down the Warrior poses, so the next few Authentic Alignment posts will be dedicated to the Warrior series and variations of Warrior poses. We will start with Warrior II because it is most accessible to all yogis, beginner to advanced.
Warrior II or Virabhadrasana II is a wonderful asana to help build confidence and groundedness. It reminds us to stay present, find unwavering concentration, and be fearless on and off the mat.
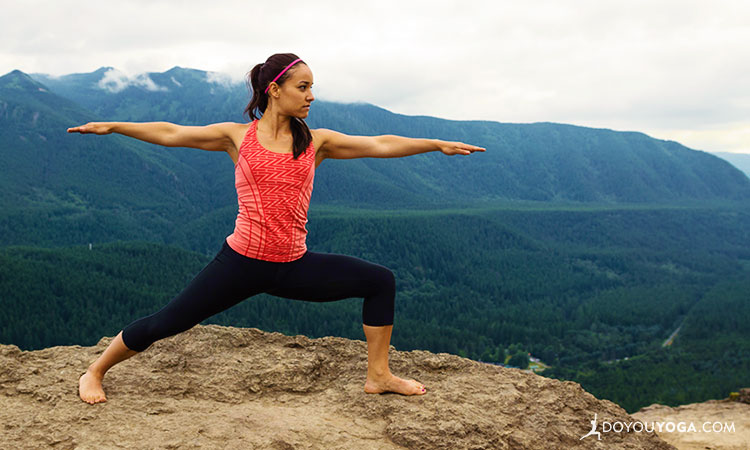
Get in Warrior Stance
To start, stand in Tadasana or Mountain Pose, then step the right foot back. In a perfect world, ankles will be under the wrists when the arms are extended. Frankly, however, this stance is way too wide for most people. So just take a BIG step back, three to four feet.
Turn the right toes in slightly so the foot is on a 70 to 80-degree angle, rather than being perpendicular to the left foot. Unless the hips are super twisty, having the feet perfectly perpendicular to each other is challenging and can compromise the knee.
A general rule in most standing poses, though, is that the kneecap should align with the toes at all times.
Front foot is facing straight ahead. The front heel should line up with the back arch. If you have an alignment grid on your mat, use it. Bisect the front foot on this line, and place the middle of the arch of the back foot on this line, too.
If you don’t have an alignment grid on the mat, you can make a line with masking tape, use a strap, or just draw an imaginary line on the mat.
Position Your Body
Then, try to bring the tailbone on the same line as that heel-to-arch alignment. Try to bring the navel to that line as well, helping you engage Mula Bandha, or the pelvic floor muscles. Next, rib cage goes on the line too. Wiggle the sides of the waist long.
Take a big breath in and reach the arms out to the sides until the fingertips are the same height as the shoulders.
Exhale to bend the front knee. The knee should never pass the front toes. Ideally, the thigh becomes parallel to the ground—but this can take years to accomplish. The shinbone is in a completely straight line from ground to sky.
Inhale to lengthen the back of the neck. Then, exhale and turn the head toward the front fingertips, and gaze just beyond them.
Beginners tend to collapse the front knee inward, so try to remember to rotate that left thigh back. Use the quad muscle and the left glute to draw the front knee in line with the ankle.
Press Down, Stretch Up, and Spread Out
Inhale and press into the feet equally, rising a little taller in the torso. Exhale and bring the shoulder blades down the back. On the next inhale, spread through the chest and collarbones. On the next exhale, again draw the shoulders down the back.
Once we get comfortable in Warrior II, we can fine-tune the alignment by engaging the back adductor and groin to ground the back foot down. Press into the balls and heels of the feet to keep the arches lifted. Feel the base of the pelvis spread to further sink the body down without moving the knees.
This asana is such a powerful stance. It makes us feel strong and confident. Standing with two strong legs has us extending to press against the ground, while simultaneously drawing energy from the earth up through the legs.
The position of our torso and forward -focused gaze reminds us to stay centered yet always reaching toward our highest potential, while staying present in the moment.