Inversions are a staple in a good yoga practice. I like to think of inverting as the fountain of youth. Turning upside down, or bringing the head below the heart, can stimulate our nervous system, bring more oxygen and blood flow to the brain, boost our metabolic rate and energy levels, work the core, rouse the lymphatic system, and help with circulation.
For beginners, inversions can be intimidating, but they are definitely worth working on and integrating into your daily practice. If you suffer from high blood pressure or are pregnant, you need to proceed with caution and check with your doctor first or eliminate inversions all together.
Otherwise, have fun and take your time establishing a good foundation in these beginner poses before building up to more advanced inversions.If you’d like to take your practice a little further, this free 30 Day Yoga Challenge will help you get into a regular, daily routine. When you start to go upside down every day, you’ll soon start seeing things from a fresh perspective!
1. Downward Facing Dog
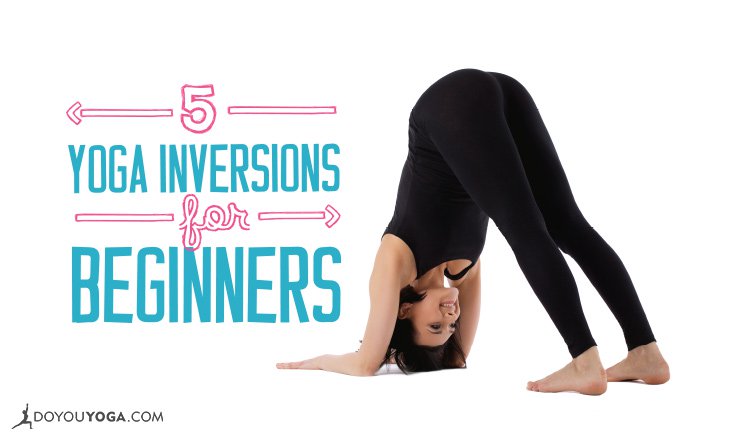
Yes, Downward Dog is an inversion! Many of my beginner students think unless you’re fully upside down, it’s not inverting. In Downward Dog, though, your head is below your heart and it’s a safe way to start to feel how you engage your arms, legs and core in an upside down positions.
Downward Dog is more or less a triangle with the head being at one end, the feet at the other, and the hips forming the tip. To come into Downward Dog, start on all fours, tuck your toes under and move your hips back towards your heels. Engage your abdominals and start to lift your hips up in the air.
You may need to walk your feet back a bit further as you come in the pose. Press firmly in to your hands as you bring your weight back towards your legs.
The common mistake is to have the torso too far forward. If your hamstrings are tight, keep the knees bent and keep lifting the hips up. Let your head release and stay for 5-8 breaths.
Once you feel comfortable with Downward Facing Dog, you can work on Three-Legged Dog or Dog Split, by lifting one leg up in the air while maintaining good form.
2. Dolphin Pose
 Credit: Kristin McGee
Dolphin Pose is a great inversion for beginners because it helps to find the strength needed in the upper body and core.
I always recommend beginners get comfortable first with Dolphin Pose before attempting Headstand; this way the foundation has already been set. But, before we move ahead too quickly, Dolphin Pose itself is an inversion to nail down.
Start on all fours and lower your elbows to the mat making sure you keep your elbows and wrists in alignment and press the thumbs and forefingers down actively. Lift your hips and back as you would for Downward Dog. Hold 5-8 breaths.
Work on lifting a leg into Dolphin Split once you get comfortable in the position. Make sure to alternate sides.
3. Headstand Prep
Headstand prep is a good way to feel comfortable with your head on the floor as you find the proper strength in the upper body and work on lifting your hips above your head.
Set yourself up as you would for Dolphin Pose, lace your hands together in a fist, with enough space between the palms (as if you could place a tennis ball there).
Place the crown of your head between your wrists (do not let it fall in to your palms) and actively press down the forearms and outer wrists to lift the shoulders up away from the ears. Walk your feet in as close as you can and hold for 5-8 breaths.
Rest in Child’s Pose when you’re done.
4. Wall T-Stand
This is one of my favorite inversions for beginners — and all yogis for that matter. It truly forces you to find your core and use you legs just as actively when you’re upside down.
Take your mat to a wall and come in to all fours with your feet tucked under at the base of the wall. Make sure you DO NOT walk your hands forward, but keep them directly under your shoulders. Lift your butt up into Down Dog and walk one leg up the wall at hip level, then step the other foot up as well and work on straightening out the legs.
You will definitely feel this in your arms, so push even harder through your legs and ignite your ab muscles. Hold for 3-5 breaths, working your way up to 5-8 breaths eventually.
If you can master this pose, you will have no problem when it comes to doing a full Handstand.
5. Supported Shoulderstand
 Image Credit: Julia Lee
Shoulderstand is the queen of the asanas and often done towards the end of class to slow things down and quiet the mind. That being said, it is far from a passive inversion.
You need to keep your legs, arms, and core working the entire time, especially in a position where the cervical spine is at risk.
I recommend all beginners prep their Shoulderstand by taking two blankets or towels one on top of another to the back edge of the mat.
If you want to fold your sticky mat over them, you can – for extra grip on the forearms. Lie down on your support with your upper back and shoulders on it and the head off the back of the padding on to the floor.
Use your abdominals to bring the legs overhead in to Plow Pose (for some this may be as far as you want to go), interlace the hands together and walk the shoulders towards the ears to come off of the cervical vertebrae. The weight should be in the arms and back of the skull.
When you feel ready, lift your legs up overhead to form a straight line. Fully engage your abs and reach your feet up to the sky. Hold 5-8 breaths or longer if you can. The tendency here is to let the body fall towards a banana shape, so every so often, you can lower the legs and reset the pose.
Remember, yoga is a journey and a lifelong one. You don’t need to kick up into any fancy arm balances to reap the benefits of inverting.
Start with these beginner-friendly inversions and before you know it, you will have more energy, more stamina, a healthier nervous system, and strong body and immune system.


