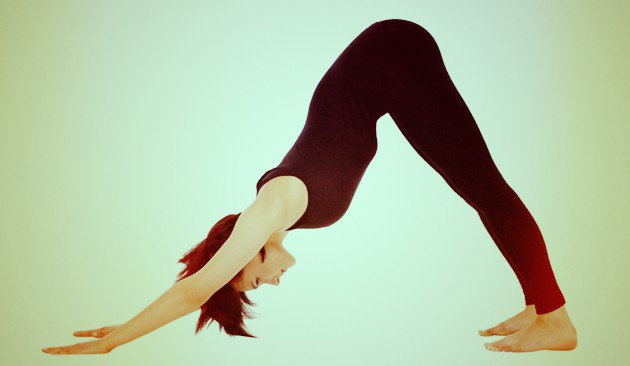
Downward facing dog (Ardo Mukha Svanasana) is one of the most widely used postures in yoga today. It’s both challenging and satisfying because you are simultaneously building strength and stretching, working the entire body at the same time.
It’s also a pose that people easily fall into autopilot mode with. It’s important to tune in to the details as they can help you create subtle but significant changes so you can receive all the amazing benefits that downward dog has to offer.
The following are by no means a complete set of instructions for the pose but they are important areas of focus that have really helped transform my experience of this amazing posture and hopefully they will do the same for you!
1. Build From Your Hands
Your hands (along with your feet) are your foundations in downward dog and there are a few subtle hand related points to be aware of. Firstly, you want to use your whole hand. Distribute the weight evenly, as though you are trying to make a complete handprint on your mat. Spread your fingers wide and keep the wrist crease parallel with the front of your mat so your middle finger is pointing forward. Press the knuckle of the index finger into the mat and keep the hands engaged this way throughout the pose.
2. Use The Strength In Your Arms
Your arms should be actively involved in this pose. It helps if you engage the muscles of your arms and feel as though you are trying to push the floor away from you. If you find this challenging, it’s okay, just keep practicing and you’ll build strength over time.
Keep the insides of your elbows facing towards each other (to avoid hyper-extending the joints) and slightly rotate your upper arms externally, as if you are trying to hide your underarms from the person next to you.
3. Your Spine Should Be Your Priority
Most beginners think the aim is to have their heels flat on the mat. It’s not. Restoring natural curvature and creating length in the spine should be the priority.
By bending your knees in the pose, you take the stretch out of the hamstrings (where so many people are really tight) making it easier for you to send your sit bones firstly up and then back. This is a really important aspect of the pose as it helps you to create more length in the spine. With the sit bones heading up and back, begin to send the thighs back. Over time your hamstrings will lengthen and eventually, one day your heels may reach the mat (though for the record, mine almost never do!).
There are many other key alignment cues that can make a big difference to this posture. My advice is to listen carefully during class, and if you’re unsure about anything ask your teacher for a few extra tips.
So how do you feel about downward facing dog? Share your thoughts in the comments section below!


