The best thing you can do for your knees is to strengthen the surrounding tissues, specifically the inner thighs. Our knees are naturally an unstable place as they sit between a wide joint (the hip) and a tiny joint (the ankle) putting the kneecap at an angle.
To combat and prevent knee pain, you can work on strengthening the interior thighs to align the patella and strengthen the ligaments using yoga postures like the Warrior Poses and Triangle. A great way to build strength is with a consistent practice. The free 30 Day Yoga Challenge will help you get into the routine of practicing yoga every day, so your body (and knees) get used to the poses.
But the very first thing you will need to do is to realign all your basic postures using these three cues in every pose.
1. Make Sure You Can See Your Toes
Make sure you can see your toes in front of your knees in Warriors or Chair Pose variations.
This ensures that your knee is stacked over your ankle and takes the stress out of the knee, while aligning the hip and strengthening your inner thighs.
2. Don’t Hyperextend
If you hyperextend at the knee, or you cannot engage your thigh muscles for any reason when your leg is straight, then slightly bend your knee for protection.
It is a one or the other scenario. No floppy legs.
3. Avoid Kneeling
Generally speaking, if you have knee pain, avoid kneeling. When you do decide to kneel down, push the weight in to the top of your feet whenever possible to relive the meniscus of additional pressure.
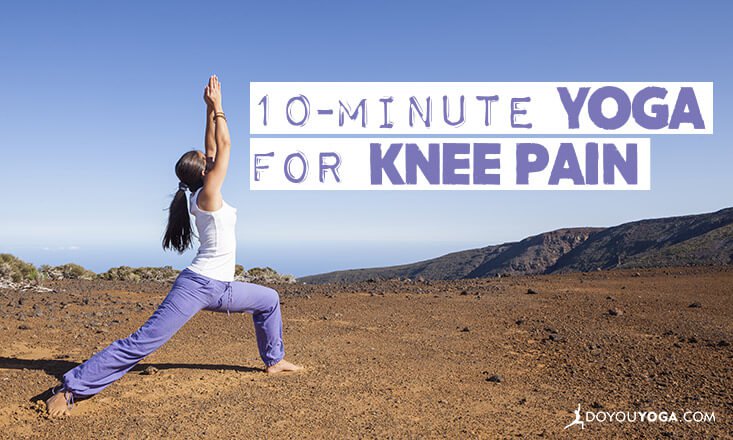
Here is a 10-minute flow to strengthen your knees and thus soothe, prevent, and erase knee pain:
1. Mountain Pose

Start standing upright. With your feet hips width distance and a slight bend in your knees, softly pull your belly and ribs in and roll your shoulders up back and down to open your chest to the sky.
Tilt your chin to your chest to open the back of your neck and pause here in Mountain Pose taking a few big breaths to center your balance and focus your mind on paying close attention to your body.
2. Forward Fold

Take a Forward Fold with soft knees and let your head drip towards the ground. Pause for a few moments. Then touch the floor under your nose with your right fingers and lift your left hand to the sky, straightening just your left knee.
Look up for 3 breaths and concentrate on trying to lift your left knee cap up your thigh. Repeat on the second side.
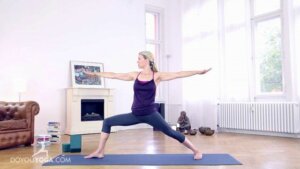
3. Warrior I

Keep your knees soft and curl up to standing. Step your right foot all the way back for Warrior I. Your back heel comes down to the floor at an angle, and that leg begins to ignite fully. Your front toes should point forward and your front knee should be bent.
Make sure you can see your toes in front of your knee and that your knee is stacked over your ankle by pressing the front knee to the left. Raise your arms to the sky, keeping your shoulders relaxed and belly in.
Pause here for 5 breaths to strengthen the inner thighs and stabilize your left knee.
4. Pyramid Pose

For Pyramid Pose step your back foot in to about midway down your mat at hips width distance with your foot still at about 45 degrees pointed out. Interlace your hands on your lower back. Either ignite your leg muscles to straighten your legs or keep a small bend in your front knee.
Straighten up your spine, pull your belly in and start to gently lower forward maintaining that long flat back and raising your arms up behind you. Pause as soon as you feel your back begin to curve and hold pyramid Pose for 3-5 breaths.
Reset at the top of your mat to do the other side.
5. Warrior II
 Next come back to Mountain Pose and step the right foot to the back setting up your legs just as your did in the first round, only this time taking Warrior II with your arms hovering parallel to the ground over your legs.
It will take a little more energy to press the front knee out to the left this time because your hips are open, so make sure you can see your toes in front of your knee at all times.
6. Triangle Pose

Next move into Triangle Pose by straightening your front leg almost all the way. Begin leaning your upper body forward over your slightly bent left leg. This might be enough, or perhaps you decide to lower your left arm to a block or your leg, keeping your torso as parallel to the mat as you can.
Maybe you lift your right arm up to the sky. Keep the front knee bent for added strength in that thigh. Hold for 3-5 breaths. Come back to standing at the top of your mat to start the opposite side.
7. Mountain Pose
Finally close your practice by taking Mountain Pose and extending your arms up and over your head. Slowly slide your palms together and through heart center to close your practice by rooting into the ground and smoothing out your breath.
You can increase your healing rate and decrease your chances of re-injuring your knees by practicing regularly and with good alignment.
Did you try this 10-minute yoga sequence to soothe your knee pain? Did it help you out? Share your results with us in the comments below!